IIS
Install PHP into IIS
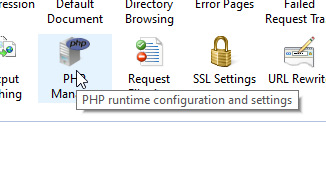
A useful tool for configuring PHP is the install PHP Manager:
https://www.iis.net/downloads/community/2018/05/php-manager-150-for-iis-10
Note that PHP versions deployed by PHP do not offer the lastest versions available and so installation of later PHP versions will need to be performed manually. The PHP version for a site can be registered through PHP Manager.
Deploy Fusio Files on IIS
Decide which folder you wish to install the application in e.g. C:\webapps\fusio.localhost.local\ e.g.
C:\webapps\fusio.localhost.local\www\cache Download the release and unzip into the target folder: e.g.
C:\webapps\fusio.localhost.local\
Permissions
Ensure that the user account IUSR has read permissions to this folder and all subfolders. Ensure that the user account IUSR had read/write permissions on cache folder
Configuring IIS for Local Development
Many of the IIS settings apply for a production ISS implementation also.
- Setting up a Local Domain
- Adding a Website to IIS
- Confirm PHP on IIS Website
- Confirm Request Methods
- Setting Up Url Rewrite
- Debugging with xDebug
Setting Up a Local Domain
For local development update your hosts file to point to your local IIS web server. Pick a local domain name that ends
in .local as browsers will complain that the site is not secure if you choose a domain ending in any other suffix. Add
the following entry in the hosts file located at C:\Windows\System32\drivers\etc\hosts (you will need to have opened an
editor as an Administrator as this is an admin secured file): 127.0.0.1 fusio.localhost.local Now the url
http://fusio.localhost.local it will resolve to your local IIS webserver.
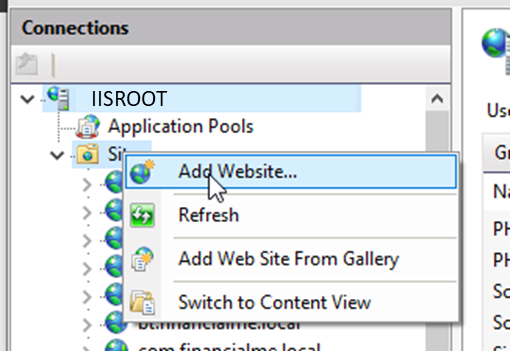
Adding Website to IIS
In Internet Information Services Manager, expand the root node and right click “Sites” and “Add Website” to configure a new site.
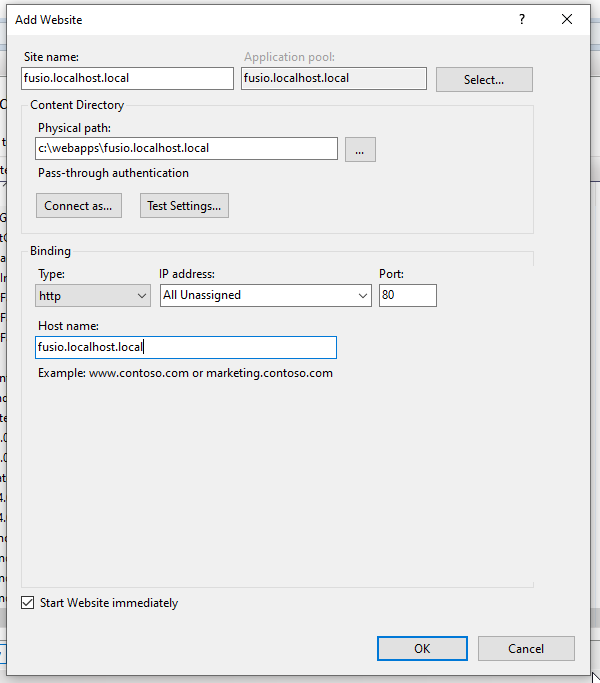
Add a Site name of fusio.localhost.local. An application pool of the same name will be created automatically.
Set the physical path to the public folder within your Fusio folder: e.g. C:\webapps\fusio.localhost.local\public
Set the host name to fusio.localhost.local to enable IIS to differentiate between the different requests that it might receive on the one web server.
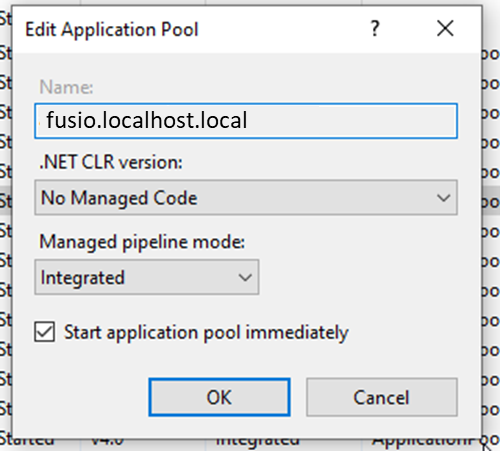
Optionally, the application pool for the Fusio installation can be configured to bypass the .net handling by clicking the “Application Pools” node in IIS manager. Double clicking the application pool e.g. fusio.localhost.local and setting the .NET CLR version to “No managed code”
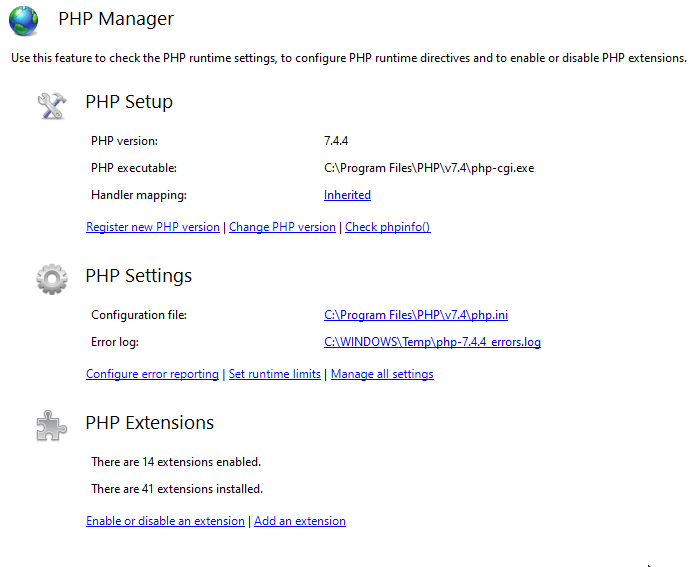
Confirm PHP on IIS
Ensure that the required PHP version is mapped to you site using PHP Manager:
Confirm Request Methods
Check the Request Methods available to the Webserver / Fusio Application
Request methods can be set at a Web server wide and application level.
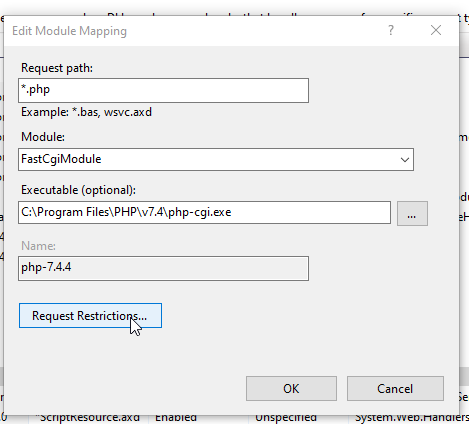
At the root node of IIS or in the Website configured for the Fusio application open the settings “Handler Mappings”:

Find the mapping for PHP in the list. It is possible to have multiple versions of PHP mapped so be sure to choose the one you have configured for your Fusio website.

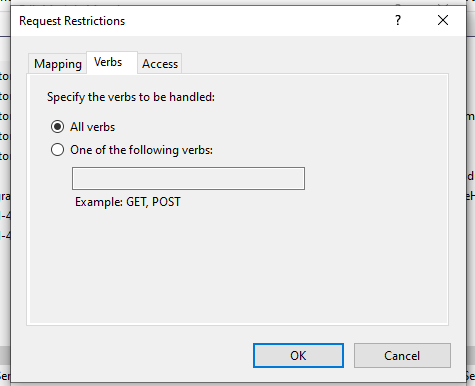
Click Request Restrictions:
Choose the tab “Verbs”:
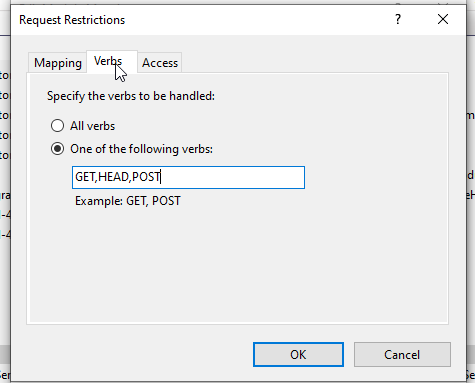
The IIS default does not include all of the request methods required by Fusio. Fusio requires the following request methods to be active – GET,POST,PUT,DELETE. Add the required verbs or on a development machine choose “All verbs”:
On the dialog “Edit Module Mapping” put speech marks around the Executable entry before clicking OK:
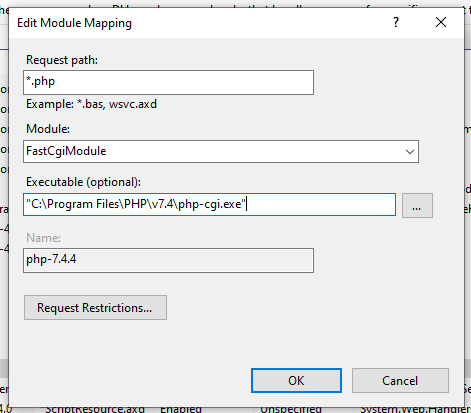
Click “Yes” in the check dialog:

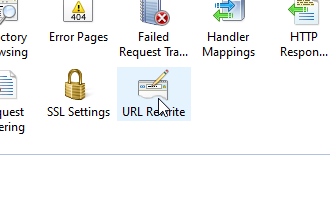
Setting Up URL Rewrite
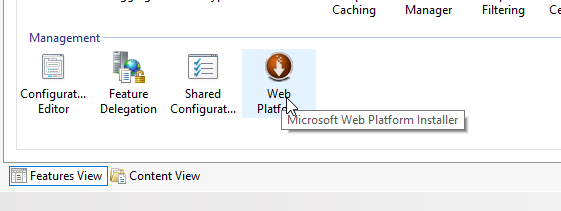
IIS has a plugin for Url Rewrite which must be installed via the Microsoft Platform installer, before it can be configured:
- Install Web Platform Installer
- Install “Url Rewrite” IIS plugin
- Configure “Url Rewrite” for Fusio website
Install Web Platform installer
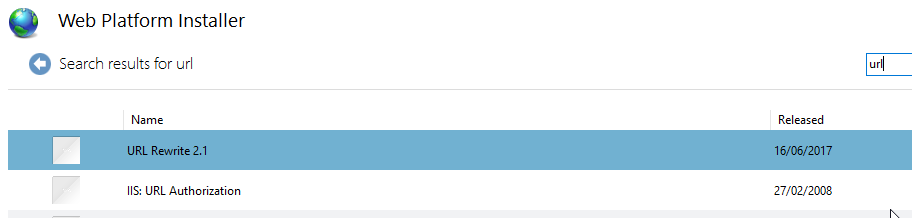
If not already installed, install IIS Url Rewrite via the Web Platform Installer https://www.microsoft.com/web/downloads/platform.aspx
Install “Url Rewrite” IIS plugin
In IIS manager:
Search “url” and click add to install “URL Rewrite 2.1”:
Configure “Url Rewrite” for Fusio website
Once installed click “Url Rewrite” in the Fusion website:
Url Rewrite rules can be imported from the .htaccess file, configured manually or set directly in the web.config file in the public folder of the Fusio installation:
- Import Rules from .htaccess
- Manual Url Rewrite Configuration
- Edit Web.config file
Import Rules from .htaccess
Within Url Rewrite click “Import Rules” on the menu on the right:

Click “…” to choose the .htaccess file in the public folder of the Fusio installation:

In the Fusion web application folders choose the “public” folder:

Click “Import”
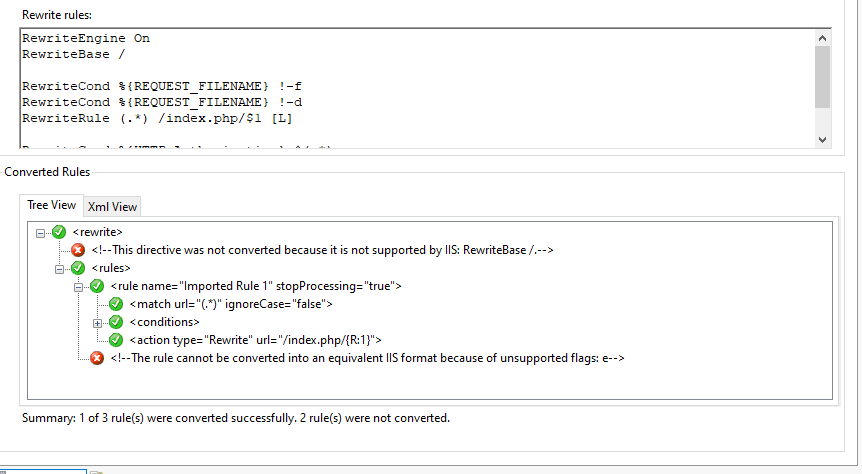
Two items need to be adjusted.
Click on the “This directive….” And the error will be highlighted in the top panel
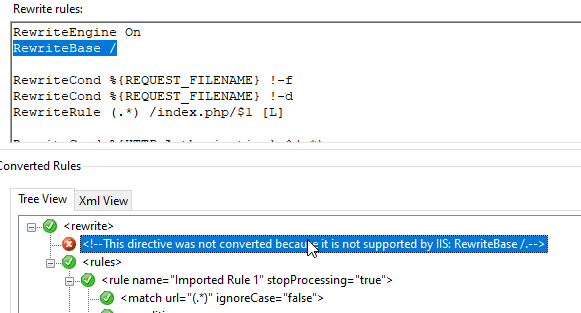
Delete the Entry “RewriteBase /” from the top panel. Click “rule cannot…” in the bottom panel:
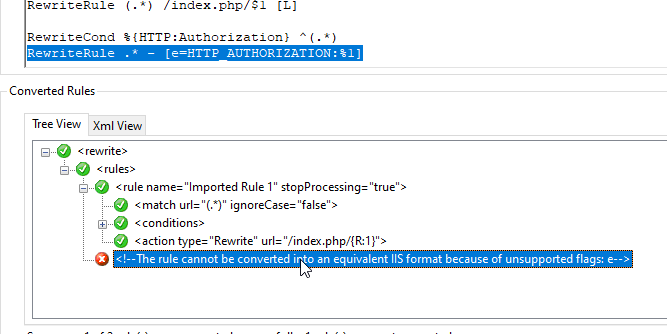
Delete the entry “RewriteRule .* - [e=HTTP_AUTHORIZATION:%1]” from the top panel. Click “Apply” on the top right menu:

Manual Url Rewrite Configuration
Match with regular expression and pattern (.*)

Conditions:


Action Rewrite /index.php/{R:1}

Edit Web.config file
Located in the public folder e.g. C:\webapps\fusio.localhost.local\public\web.config. It is possible that this file
includes other settings. The url rewrite settings are under the <rewrite> node
<?xml version="1.0" encoding="UTF-8"?>
<configuration>
    <system.webServer>
        <rewrite>
            <rules>
                <rule name="Imported Rule 1" stopProcessing="true">
                    <match url="(.*)" ignoreCase="false" />
                    <conditions logicalGrouping="MatchAll">
                        <add input="{REQUEST_FILENAME}" matchType="IsFile" ignoreCase="false" negate="true" />
                        <add input="{REQUEST_FILENAME}" matchType="IsDirectory" ignoreCase="false" negate="true" />
                    </conditions>
                    <action type="Rewrite" url="/index.php/{R:1}" />
                </rule>
            </rules>
        </rewrite>
    </system.webServer>
</configuration>
Debugging with XDebug
IIS requires “Non Thread Safe” dlls as extensions and so when downloading xDebug choose the NTS version:
Copy the required dll to the ext folder of your PHP folder e.g. C:\Program Files\PHP\v7.4\ext Add xdebug configuration
to the php.ini in the PHP folder e.g. in the file C:\Program Files\PHP\v7.4\php.ini add the line:
zend_extension="C:\Program Files\PHP\v7.4\ext\php_xdebug-2.9.4-7.4-vc15-nts-x86_64.dll"
To activate xDebug for your application, either add the following to your php.ini to activate xDebug for all web applications running on IIS:
xdebug.remote_autostart=1
xdebug.remote_enable=On
xdebug.remote_host=localhost
xdebug.remote_port=9000
xdebug.remote_handler="dbgp"
or add a file to the web root “.user.ini” with this configuration to activate xDebug for an individual application
(preferred): e.g. C:\webapps\fusio.localhost.local\.user.ini This will limit debugging to the Fusio web application.
IDE configuration is dependent on the IDE you are using. Set autostart=0 and remote_enable=Off to disable debugging.
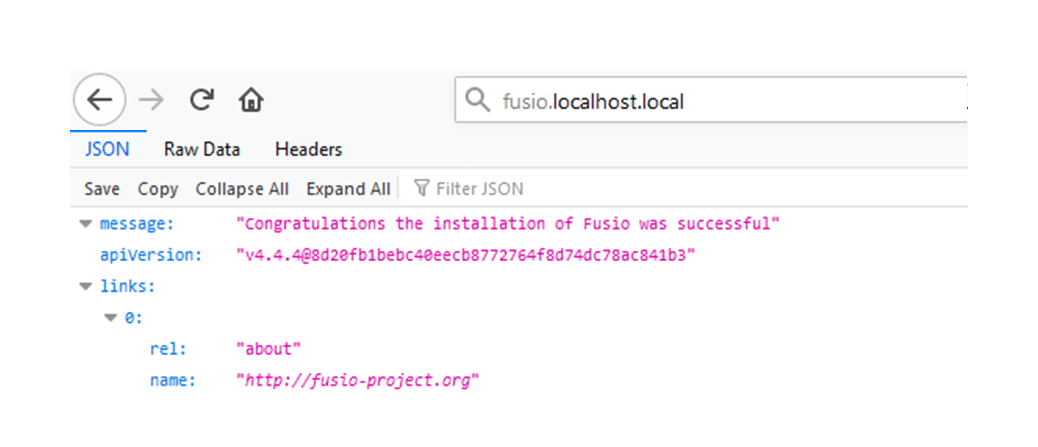
Test Installation
Enter fusio.localhost.local into your browser window and you should see: